Austerlitz - 2 December 1805
Historical Background
The Battle of Austerlitz (December 2, 1805/11 Frimaire An XIV FRC), also known as the Battle of the Three Emperors, was one of the most important and decisive engagements of the Napoleonic Wars. Widely regarded as the greatest victory achieved by Napoleon, the Grande Armée of France annihilated a larger Russian and Austrian army led by Tsar Alexander I and Holy Roman Emperor Francis II. The battle occurred near the village of Austerlitz in the Austrian Empire (modern-day Slavkov u Brna in the Czech Republic). Because of the near-perfect execution of a calibrated but dangerous plan, the battle is often seen as a tactical masterpiece of the same stature as Cannae, the celebrated triumph by Hannibal some 2,000 years before. Austerlitz brought the War of the Third Coalition to a rapid end, with the Treaty of Pressburg signed by the exhausted Austrians later in the month.
The stage is set. The battle lines are drawn and you are in command. Can you change history?
|
|
Set-Up Order
|
Battle Notes
Russian Army
• Commander: Alexander I
• 5 Command Cards
• Move First![]()
![]()
![]()
![]()
![]()
![]()
 |
 |
 |
 |
 |
 |
 |
 |
 |
 |
 |
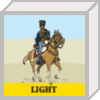 |
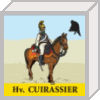 |
|||
| 5 | 1 | 2 | 1 | 1 | 1 | 1 | 1 | 3 | 3 | 2 | 1 | 1 | 1 | 2 |
French Army
• Commander: Napoleon
• 6 Command Cards![]()
![]()
![]()
![]()
![]()
 |
 |
 |
 |
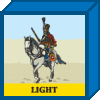 |
 |
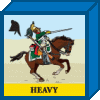 |
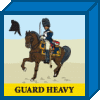 |
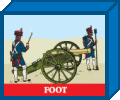 |
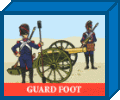 |
|
| 8 | 3 | 1 | 1 | 2 | 2 | 1 | 1 | 2 | 1 | 4 |
Davout and his III Corps
 |
 |
|
| 1 | 1 | 1 |
Victory
12 Banners
Special Rules
• The French player gains 1 Temporary Victory banner when a French unit occupies Holubitz at the start of the turn.
• The French player gains 2 Temporary Victory banners when a French unit occupies Krzenowitz at the start of the turn.
• The French player gains 2 Temporary Victory banners when a French unit occupies Pratze at the start of the turn.
• The Russian player gains 1 Temporary Victory banner when a Russian unit occupies Telnitz at the start of the turn.
• The Russian player gains 1 Temporary Victory banner when a Russian unit occupies Bosenitz at the start of the turn.
• The Russian player gains 2 Temporary Victory banners when a Russian unit occupies Sokolnitz at the start of the turn.
• The Goldbach is a fordable stream.
• The Littawa is impassable except at the ford.
• Davout and the 2 units of his III Corps enter the map at the beginning of French turn 4 along the baseline map edge of the French right section.
• Pre-Battle Mother Russia Roll rule is in effect. Saber rolls have no effect--the Tsar expects an advance!
Since the history of Austerlitz is so well-known to Napoleonic wargamers, I devote this space to brief design notes for this scenario.
- Design Principle
There are already two great player-designed Austerlitz all-in-one scenarios posted, GG01 and PS01 (apparently this battle is a favored subject for first submissions!). Both are excellent, well-crafted interpretations of the battle, and this scenario owes something to both of them. The idea behind the current scenario, which is not intended in any way to be definitive, nor as any type of improvement over its predecessors, was to write a “traditional,” relatively minimal, straightforward design, typical of the official large-battle C&C scenarios, but with sufficient unit density to provide for tactical depth. The setup is linear, strategic objectives are stylized, and each side has clearly defined material and positional strengths and weaknesses. The design encourages gameplay in the general direction of the historical engagement while limiting special rules and complexity.
- Map
The map gives a zoomed-out strategic view of the battle space, and strives for geographic accuracy, especially with respect to relative distances between specific locations (i.e. the towns, the heights, the rivers, etc.). In line with this strategic approach, Telnitz and Sokolnitz are depicted as single hexes, but note that the latter is represented by a walled farm, to reflect the strength of Sokolnitz Castle and its surrounding buildings. Krzenowitz is squeezed onto the map to give the French a central objective at the heart of the Allied position. Sokolnitz and Pratze are weighted at 2 VPs in order to incentivize historical play. Krzenowitz is valued at 2 because of the difficulty of taking it, and because its capture means the Allies’ retreat path has been cut. The Goldbach is fordable, but the Littawa is impassable, so the Allied army may be forced against it in historical fashion.
- Armies
The armies are scaled very approximately at one block per division. The French hold a slight edge in overall numbers, and the Allies do not have the numerical superiority which they enjoyed historically, both in order to account for French troop quality, and to give the French player a reasonable chance as the attacker. The Allies do have their historical edge in artillery. The French and Russian Guard are present, though I replaced the Russian Guard Heavy Cavalry unit (which in my opinion is overpowered and inelegant) with regular Russian cuirassiers. The cossacks of the Advance Guard are omitted from the order of battle, but may appear if cavalry is rolled on the PBMRR. The French are well-deployed to begin a combined arms assault against, Pratze, Bagration, or both. The Allies are positioned for their historical lunge towards Telnitz and Sokolnitz, and their artillery is not in place to bombard the massed French line. Davout’s III Corps, entering on turn 4, should arrive just in time to bolster the French right flank.
- Cards, Balance, and Gameplay
While 5 cards may seem generous for an Allied army which was caught thoroughly wrong-footed, playtesting demonstrated that this is the right number to enable any Allied advance, or at minimum an energetic counterattack. An Allied player limited to 4 cards is effectively precluded from developing a plan of attack, and will tend to passively reposition his forces and take potshots, a far cry from the confident, grandiose assault envisioned by Tsar Alexander. Even with a 5-card hand, the Allies will be hard-pressed by a strong French army with ample infantry reserves, and excellent cavalry. The French will take heavy casualties on the attack, but with proper handling and reasonable card luck should be able to fill the gaps in their line, and come to grips with the Allies on the heights, at which point their reliable line infantry can inflict severe damage. The French player must negotiate the usual treacherous path between attacking prematurely with poor cards or insufficient forces, and dawdling too long, thereby allowing the Allies to severely wear down his army. He will be assisted by the poor deployment of the Allied artillery, and the temptation of the Goldbach towns, which will tend to draw in and tie down enemy forces. The scenario is fairly balanced overall, with perhaps a slight advantage for the French.
I am greatly indebted to my friend Elliott Becker who assisted me in extensively playtesting this scenario and contributed numerous ideas and suggestions.

