Victory Results:
 0 %
Record a victory for BOTTOM ARMY  100 %
Total plays 3 - Last reported by Rockn on 2023-11-02 19:18:29

After the success of Operation Torch in November of 1942, Allied forces energetically pursued the Axis forces that had begun retreating into Tunisia.
Although progress was extremely slow, the Allies slowly gained vital ground in their advance towards victory in Africa.

"Note: This scenario makes for a great 3-player game, with each player taking the forces of a different nation."

"Anyone who has to fight, even with the most modern weapons, against an enemy in complete command of the air, fights like a savage against modern European troops, under the same handicaps and with the same chances of success."
General Erwin Rommel


  Allies German
Division 1

BRITISH DIVISION
6 Squad Bases

- 10 Regular Infantry
- 8 Elite Infantry
- 2 Officers
- 2 Mortar Crews

1 Bren Gun Carrier
1 Matilda II

1x Recon
1x Flamethrower

4 Squad Bases
- 6 Standard Infantry
- 6 Elite Infantry
- 1 MG Crews
- 1 Mortar Crews

1 Flak 36 AT Gun

Division 2

AMERICAN DIVISION
6 Squad Bases

- 12 Regular Infantry
- 6 Elite Infantry
- 2 Officers
- 2 Mortar Crews

1 M3A 1 Half-track
1 Sherman M4A1

3x Flamethrower

4 Squad Bases
- 8 Standard Infantry
- 2 Officers
- 4 Elite Infantry
- 1 MG Crews

1 Panzer III

Strategy Decks Command 1 German Air Support 1
Starting Strategy Cards 2 2
Operations Cards - -
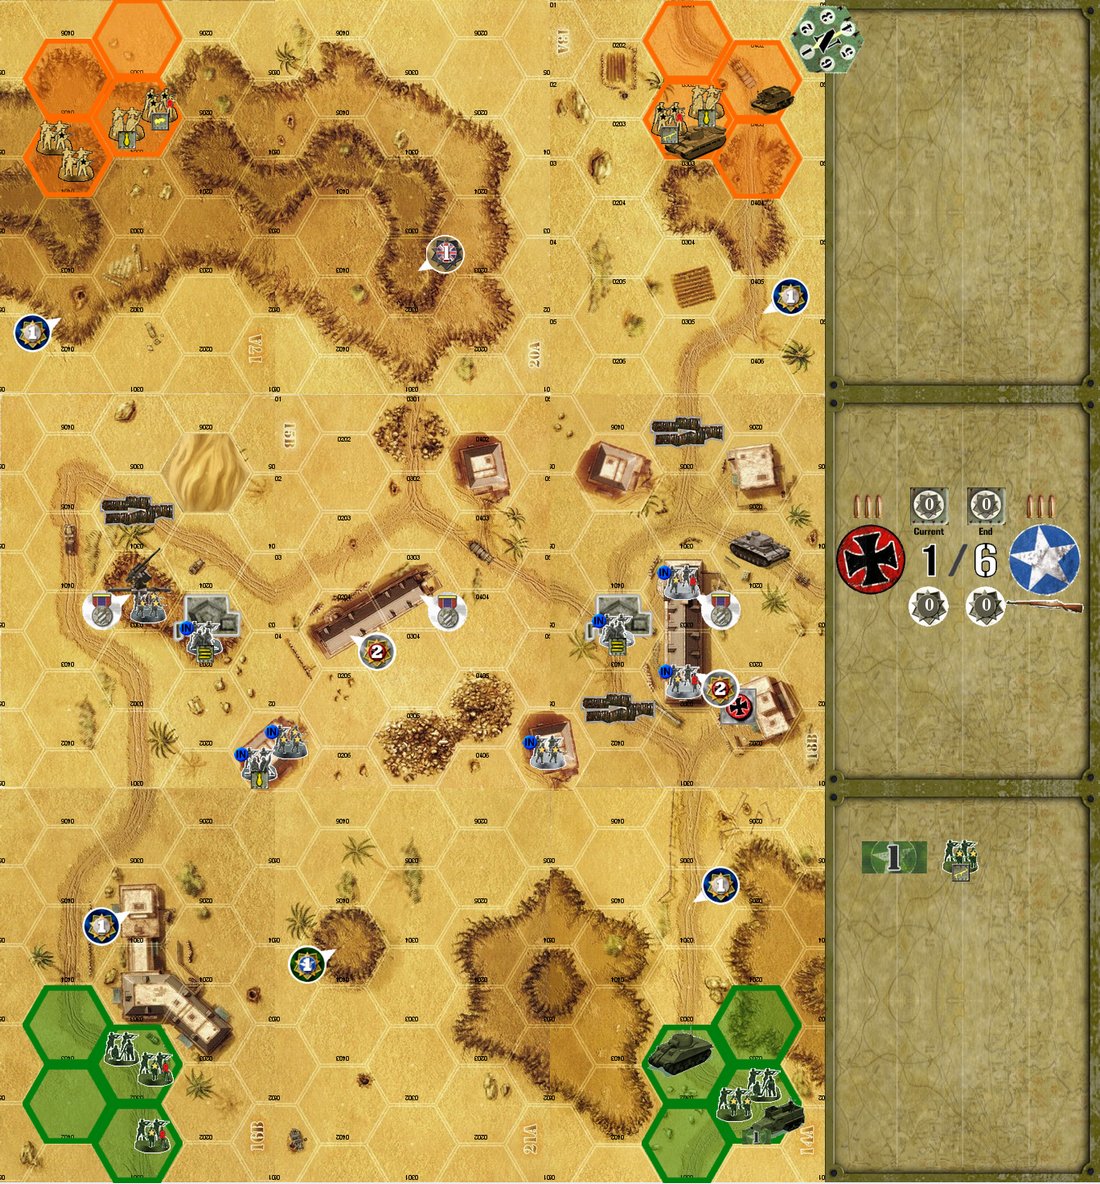
Deployment Zone British Division: Any hex with an orange border.
American Division: Any hex with a green border
Division 1: Any of the hexes on map 19A
Division 2: Any of the hexes on map 18B.
Starting Initiative Initiative Token  
Objective At the end of each game round, if a British or American unit is in a hex containing an objective marker, remove the marker from the board.
The Allies win if all three objective markers are removed from the board by the end of round 6.
The Germans wins if the Allies are unable to fulfill their objective by the end of round 6.
Rounds 6
Actions per turn 3 3
Reinforcements - -
Special Rules The Germans must set up their forces first.


Log in to comment
Discuss this article in the forums (9 replies).
JVHillegas-Elting replied the topic:
2 years 7 months ago
When playing last night, we realized that at start-up, the Brits have two Recon squad specializations available to them, when the scenario description states the Brits should only have one Recon specialization.
JVHillegas-Elting replied the topic:
2 years 7 months ago
Scubaseth and I played this again last night, with the same faction assignments. I lost as the Axis again, but only just barely, and only because I made a stupid tactical decision with my Pz III that led to its easy destruction by the Allied double-mortar squads during Round 4. Up to that point I was in pretty good control of things, thanks to the fact that my 88 mm gun was actually able to fire the first two rounds, and knock-out the Sherman and Matilda.

My impression after two play-throughs now is that the Axis have a razor-thin margin for victory, while the Allies have more flexibility in their decisions and actions. And mistakes--the Allies can make more mistakes than the Axis, and still come out victorious.

We started playing it again, this time with the factions swapped. Scubaseth began with the same Axis setup I started with. We're only partially through the first round, so it's still early days.
JVHillegas-Elting replied the topic:
2 years 7 months ago
Scubaseth and I played this one last night, he as the Allies and me as the Axis. He walloped me--I conceded early in the Action Phase of Round 3, after he'd knocked-out my last two units with any significant firepower (the Pz III and the MG in the eastern pillbox) and I hadn't scratched either of his tanks.

The reason I hadn't scratched the tanks was because in Round 1 he successfully Pinned two squads I had to activate the 88 mm AT gun, and in Round 2 he successfully Routed those same squads. He did all this using his double-mortar Brit squad. These mortar attacks were low-probability (a.k.a., lucky) rolls, and they absolutely stymied the Axis' ability to defend.

We're going to play again with the exact same setup, because I want to see how the scenario will proceed if the 88 actually can get a shot or two off at the Sherman or Matilda. Until we play again I will withhold my view on whether or not the scenario is unbalanced toward the Allies (with the 3 flamethrowers and 2 double mortars); but, I can definitively say that if the 88 can't at least disable one of the tanks with heavy damage within the first two rounds, it's impossible for the Axis to win.
alecrespi replied the topic:
2 years 7 months ago
Posting here some comments found online.
www.boardgamegeek.com/geeklist/43255/tid...layer-comments-balan
  • The Allies easily won by taking control of all objective markers by end round 4, with the Germans pinned and therefore not able to remove/kill the Allied squads in the objective hexes.
  • Easy Allies win in 4th round. In my opinion this one is unbalanced. 3 Flamethowers and 2 double mortars are just too strong for Germans. 
  • This one has undergone changes in the 1A version, because it indeed highly favoured the Allies.
JVHillegas-Elting replied the topic:
2 years 7 months ago
Alessandro: The Vassal map is fine. I was referring to the printed scenario in the DotF Next Wave published hard-copy version. That's the one with the mistake.
alecrespi replied the topic:
2 years 7 months ago

The correct map tile should be 15B.
 
I can confirm that in both scenario page and Vassal setup I've used the correct map tile 15B.

I'm missing the original DoF scenario but I've found these pictures from BGG...
boardgamegeek.com/image/306505/tide-iron-days-fox
boardgamegeek.com/image/3599541/tide-iron-days-fox
 
JVHillegas-Elting replied the topic:
2 years 7 months ago
An FYI for the community:

In preparing to play this on Vassal with a couple friends this week, I found that the DotF NW scenario map image has an error. It incorrectly shows an image of map tile 13B in the center of the map, overlayed with the number "15B." The correct map tile should be 15B, and the image in the scenario description should show the buildings and road fork hexes of map tile 15B rather than the hill, rough terrain, and double dune hexes of map tile 13B.

I don't have a copy of the original DotF expansion scenario at-hand to compare and see if the designers made this same mistake in the earlier version.
alecrespi replied the topic:
2 years 10 months ago
Fixed both, thank you!
joeyama replied the topic:
2 years 10 months ago
Hi,

1A added following note:

"Note: This scenario makes for a great 3-player game, with each player taking the forces of a different nation."

And Rommel said:

"Anyone who has to fight, even with the most modern weapons, against an enemy in complete command of the air, fights like a savage against modern European troops, under the same handicaps and with the same chances of success."
-General Erwin Rommel

Thx!
-joe