Total Plays: 6
Top Army
(67%)
Avg VP: 1
Bottom Army
(33%)
Avg VP: 5

HISTORY DETAILS
The extreme right of the Oda-Tokugawa army was not protected by wooden pallisades, as were the center and left. So when Yamagata Masakage and Hera Masatane charged forward it became one huge melee. Although Yamagata Masakage was skilled in combat, which was also proved this day, he was no match for a hail of bullets, which shot him from his horse. At this point in the battle Takeda Katsuyori ordered a general attack, but even this assault could not break the Oda-Tokugawa lines.
The stage is set, the battle lines are drawn, and you are in command. Can you change history?


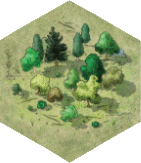
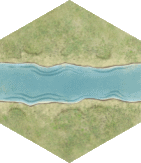
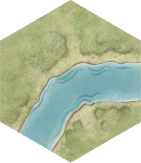
Fence Palisade Forest Hill River River
4 9 3 10 2


Oda-Tokugawa Samurai Army (Red)
Move First
Command Card Command Card Command Card Command Card Command Card
Dragon Card Dragon Card Dragon Card Dragon Card Dragon Card
Honour & Fortune Honour & Fortune Honour & Fortune Honour & Fortune Honour & Fortune Honour & Fortune Honour & Fortune

Ashigaru Yari Ashigaru Arquebus Samurai Bowmen Samurai Spearmen Samurai Spearmen Cavalry Infantry Leader Cavalry Leader
5 4 1 1 1 3 1

Takeda Samurai Army (Blue)
Command Card Command Card Command Card Command Card Command Card
Dragon Card Dragon Card
Honour & Fortune Honour & Fortune Honour & Fortune Honour & Fortune

Ashigaru Yari Ashigaru Bowmen Samurai Spearmen Cavalry Cavalry Leader
3 2 5 2

Victory
5 Banners
* 1 Victory Banner for each unit or leader eliminated.
* The Oda-Tokugawa player gains 1 permanent Victory Banner at the end of the turn, for each "Order One Unit" Command card he plays. The Oda-Tokugawa player, however, cannot gain his final Victory Banner this way.

Special Rules
* All fence terrain hexes are also considered palisades.
* The Regongawa stream is fordable.


Log in to comment

NightOwl3 replied the topic:
1 year 10 months ago
Judd and I rounded out this series of a four scenario set with a spectacular finish. It came down to a 4 to 4 banner standoff. This game included two dragon card attempts by me to kill his leaders: a Ninja card, and a personal challenge. The Ninja failed, but I did get a kill with the Personal Challenge. I also forced one of his leaders to commit seppuku. However, both of these "wins" don't give banners, and while they did rid me of two of Judd's leaders, I did not advance in banners.

This game is the last of four that pit the glorious mounted samurai against gunners behind palisades. We both learned early on that it is very hard to get troops out of the palisades. Red (Oda) always has an advantage in the series. On this fourth scenario in the set however, there is one weakness in the line of defense: Oda's right flank. I decided going in to attack on his right to try and exploit the hole. However, that was also my left where I lacked enough cards. I pushed in and did some damage, but it was hard to follow through. The Dragon cards though did help to kill leaders. I finally ran out of steam, and had to push towards his left where the fences were. I got stuck and started to stall there. It was four banners to four (he got one banner via the one unit card). At this point I decided to pull everyone on my right back and try to move to the left and mop up his worn out troops. It almost worked. But Judd used an important rule to move leaders by discarding Dragon cards. This saved him from certain defeat. He was able to go on the offensive with more courage, and backed up with a Panic card hit my blue unit infantry. Red wins 5-4. Judd was able to get the White Dragon card to add one to his hand, then lost one card due to the seppuku, and then won it back again with a dip into the discard pile. He also got all the cav. charge cards, while I had none. It was al really close game and as you can see in the next picture, I went way into his territory while he did the same to me.

Great game Judd! One for the books.

After all four scenarios in this battle, Red won all four.