Victory Results:
 50 %
Record a victory for BOTTOM ARMY  50 %
Total plays 10 - Last reported by Davesnothere on 2022-08-05 15:22:08

HISTORY DETAILS
Early in 1540, Akihisa, leader of the Amako, proposed a full-scale invasion against the Mori. Before attacking the capital city of Mori, as an advance force, he sent the troops of Amako Kunihisa, of the Shinguto clan, via the Bingo pass to take the castle of Mori loyalists, the Shishido. Kunihisa moved quickly into Yoshida, but when his troops reached the River Enokawu, it was so bravely defended by the Shishido, that he was forced to give up and he returned to Izumo.

The stage is set, the battle lines are drawn, and you are in command. Can you change history?


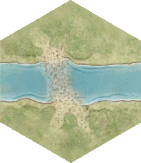
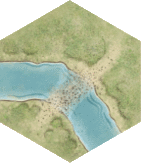
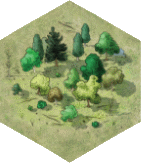
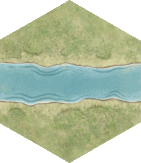
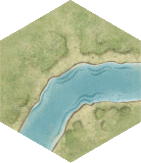
Ford Ford Curve Forest Hill River River
2 2 5 6 6 3


Shishido Samurai Army (Red)
Move First
Command Card Command Card Command Card Command Card Command Card
Dragon Card Dragon Card Dragon Card Dragon Card
Honour & Fortune Honour & Fortune Honour & Fortune Honour & Fortune

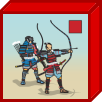
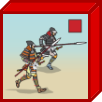
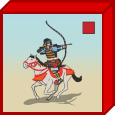
Ashigaru Yari Ashigaru Bowmen Samurai Bowmen Samurai Spearmen Samurai Bowmen Cavalry Cavalry Leader
2 1 2 1 2 1

Shinguto Samurai Army (Blue)
Command Card Command Card Command Card Command Card
Dragon Card
Honour & Fortune Honour & Fortune Honour & Fortune Honour & Fortune

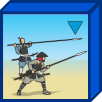
Ashigaru Yari Ashigaru Bowmen Samurai Bowmen Samurai Spearmen Samurai Bowmen Cavalry Infantry Leader Cavalry Leader
5 1 1 2 2 1 2

Victory
5 Banners
• 1 Victory Banner for each unit or leader eliminated.
• The Shinguto army gains 1 Victory Banner for each unit across the river at the start of the Shinguto player’s turn.
The Victory Banner is retained as long as the unit remains on the Shishido side of the river.

 Special Rules
• The River Enokawa is impassable except at the shallow fords. The fords do not have any movement or combat restrictions.
• All hill hexes are impassable.

Log in to comment

Pevans replied the topic:
2 years 4 months ago
Time (17th Nov 2021) for Evert's and my return match at this scenario and my turn to attack with the Shinguto.

I decided on a bold approach and made an immediate assault on the leftmost ford. [ I had a stack of left wing cards.] I expected my Ashigaru to be pushed back, thus allowing my Samurai to attack in their place. However, my Samurai Spearmen were caught napping [an "Ambush" from Evert] and the attack was quickly on the back foot. [The score's 0:1 to Evert]

Nothing daunted, I threw my Samurai Bow Cavalry across the river, taking out the Shishido Samurai Bowmen in their way. [1:1]

The mounted Shishido Samurai archers promptly occupied the ford, attacking my cavalry from the rear and killing their Leader. [1:2]

Shinguto efforts came to nought [a spectacularly bad "Shogun" card] and my cavalry fell. [1:3]

The Shinguto still had the numbers on the left to force the ford, but it was obstinately defended by the Shishido mounted Samurai archers. First my Ashigaru spearmen fell to their swords [1:4] and then so did my Samurai Bow Cavalry. [1:5]

This was a significantly quicker - and more ferocious - battle than our previous play. The result was the same, though, leaving the aggregate score at 6:6. I think Evert's a quick learner. :-)
Pevans replied the topic:
2 years 4 months ago
My regular C&C opponent, Evert, fancied a go at Samurai Battles as a change from our continuing Napoleonics play-through. We opted for this scenario (on 7th Nov 2021) so that Evert could give his attacking instincts full rein as the Shinguto while I could defend the fords to my heart's content (and shoot the sh*t out of the attackers).

Evert duly moved spearmen towards the fords, only to have them scampering backwards again as my archers opened up ["Hold and Shoot"]. But not all of them. One gallant band of Shinguto Ashigaru charged across the ford centre-left. Straight at the Shishido Samurai Spearmen. Oh dear. [And the score's 1:0 to me]

Bolstered by the mounted Samurai, the archers on my right inflicted further damage on the Shinguto forces on their centre-left and they pulled back out of bowshot. The Shinguto continued to advance centre-right with occasional push-backs from the Shishido archers here. Retreats were leaving the Shinguto with little in the way of Honour points.

Then I sprinted my Samurai horse archers across the leftmost ford to hit the Shinguto lurking out of range. [Well, I had a "Cavalry Charge"] The Shinguto fought hard, but superior tactics ["Ambush"] allowed my cavalry to finish off the opposing [one-block] Samurai Spearmen and then [with the help of a "Physician"] wipe out the Samurai Bowmen. [3:0]

However, the remaining Shinguto on (their) left finally did for the brave cavalry. [3:1]

Attention now switched to the other side of the battlefield where the Shinguto were massing against the two fords. The mass was reduced when my Samurai horse archers finished off the Ashigaru Bowmen pinned against the hills. [4:1]

The Shinguto then attacked both right-hand fords. The single combat between leaders [Evert tried a "Personal Combat"] over the rightmost ford came to nothing and the attackers were repulsed from the other. The Shishido Samurai Spearmen chased them across the ford and attacked, backed up by fire from their Bowmen colleagues. Fierce fighting followed until I finished off the Shinguto Samurai Spearmen. [That's a win, 5:1]

Having played this scenario before, that was pretty much what I expected - though nephew Tom has shown that the Shinguto can win if they can force one of the fords (and rack up points for units across the river.
Pevans replied the topic:
2 years 7 months ago
As I was already on the blue side of the board, I took Shinguto first against nephew Tom's Shishido. I was able to attack on both flanks. On the left it was an archery duel. I brought up my mounted samurai bowmen, but Tom did the same, making it three Shishido against two Shinguto. Hmm... But I really didn't want to march my spearmen slowly forward against the bows.

On the right, the Shinguto forces massed against the ford just right of centre. My samurai foot spearmen led the charge, forcing Tom's defending ashigaru (down to a single block) to retreat and seizing a bridgehead. Tom hit them with his samurai foot spearmen, supported by the samurai archers from the centre and the Samurai bow cavalry that were in reserve. Bye bye my samurai spearmen (and that's 0:1 to Tom) as the ford was occupied by the Shishido samurai.

Bad news on the left flank, too, as my mounted archers took 4 hits to the 2 I inflicted on their opposite numbers. That's 0:2.

With a lead in victory banners, Tom then played his masterstroke. With plenty of Honor and Fortune chips built up, he played the "Turncoat" Dragon card. For the fourth time in six battles. However, this time I managed to roll some 'Honor and Fortune' and the Turncoat failed. Phew!

My ashigaru and mounted bowmen pressed the attack on the ford, eliminating the Shishido samurai (1:2) and again getting across the river. Tom threw everything he had on that flank (including the one-block ashigaru) into a counter-attack. A lucky die roll removed my mounted archers and I lost an ashigaru unit as well, while I took out that damaged unit and Tom's foot samurai. (3:4)

The Shishido mounted bowmen stormed across the ford to chase down my ashigaru, eliminating one unit, whose leader took the honourable course of seppuku (I didn't have enough Honor and Fortune chips to pay for a retreat!). On top of this, Tom's archers took out my bowmen on the left. That's 3:6, which is when we spotted that he only needed five victory banners to win. Oops!

We re-set the scenario and played the other sides, which went pretty quickly. We both started with lots of left section cards and Tom charged his left flank forces up to the river. With no cards to do anything on my right, I just had to stand there and take it. My archers were engaging his archers on my left (to little effect) and I had some archers in the centre just in range to support my right. Tom powered through my defenders, destroying two units and getting his first one across the river. (0:3)

I got one back, taking out an ashigaru spearmen unit (1:3) but Tom had moved another unit over the river (1:4). Finally, he brought two more units across the ford and eliminated a third ashigaru unit to take the score to 1:5. Those extra units across the river mean it would have been 1:7 on his next turn. Sigh.

(This report is also on my BGG blog, with photos: boardgamegeek.com/blogpost/123222 )
NightOwl3 replied the topic:
2 years 9 months ago
In this battle Judd jumped in to play one side, just like I jumped in to his CCN solo march through those scenarios.

Judd and I are still getting our feet wet with CCS, so it has been fun learning the new tricks and tactics.

Judd was Red and I was Blue. For the first part of the game, Judd kept me pinned down and hitting me with ranged weapons. I took some hits. I finally was able to push in the center section with my two Cav archers and my one foot archer. Then with a charge I sent the Cav to push him back from the river. We had an epic battle at the ford in the center section where our Cav and foot bowmen went down to the wire. I had one Cav bowman who just would not die. When Judd rolled a double red to take him out, I played the "Shot Proof" dragon card to save him. At the end my 1 Cav unit took out two units on Judd's side and was one his side. Blue wins 6-2. However, it was much closer that it seems on paper.

Good Game Judd!