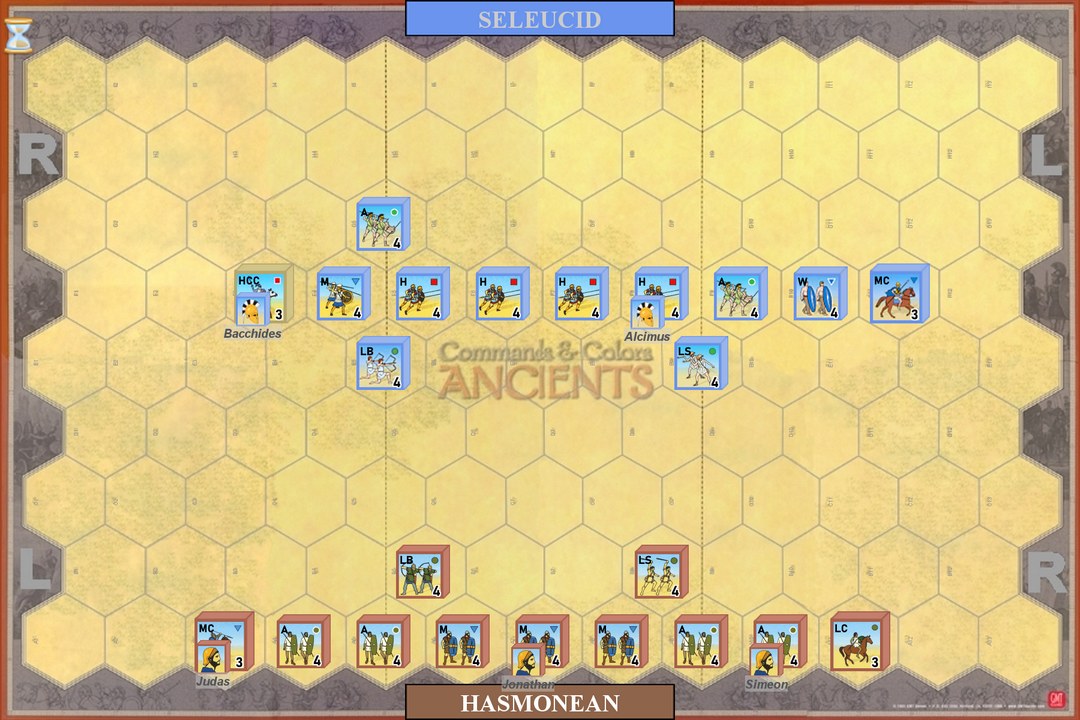
Historical Background
With his victory at Edasa, Judas Maccabaeus consolidated his control over Judaea and Jerusalem, except for the isolated Seleucid garrison in the Acra fortress. Judas even secured a pact with Rome. Meanwhile in Antioch the former heir to the throne, Demetrius I, had escaped his captivity in Rome and siezed the kingship by killing Lysias and Antiochus V. The eastern satrapies rose in revolt against Demetrius under the leadership of Timarchus. Demetrius headed east and crushed the rebellion, and assigned Bacchides and Alcimus to deal with the Jewish problem. Bacchides had 20,000 foot and 2,000 horse. Judas apparently had only 3,000 troops of whom all but 800 fled before the battle, a clearly ridiculous number considering Judas met the Seleucids in the open and that the battle lasted a long time. Bar Kovcha believes the Jews had rough parity with the Seleucids and therefore felt confident to meet them in open terrain north of Jerusalem. In the account of the battle the Jewish left wing attacked and broke the Seleucid right with Bacchides, and pursued them for a long distance, until the Seleucid left wing cavalry came to the rescue and killed the now surrounded Judas. It is the belief of Bar Kovcha that Bacchides's retreat was feigned in order to draw Judas into the trap where he could be killed thus ending the revolt, but with Judas's death command of the revolt passed to his brother Jonathan and the rebellion continued.
The stage is set. The battle lines are drawn and you are in command. Can you change history?

War Council
Seleucid Army
Leader: Bacchides
Take 5 Command Cards ![]()
![]()
![]()
![]()
![]()
Move First ![]()
Hasmonean Army
Leader: Judas Maccabaeus
Take 6 Command Cards ![]()
![]()
![]()
![]()
![]()
![]()
Victory
5 Banners
Special Rules
The Seleucid heavy cavalry unit is cataphract heavy cavalry.
Read more notes/rules HERE.
Original PDF ![]() : click here to download Jim Duncan maps/scenarios (JDxx)
: click here to download Jim Duncan maps/scenarios (JDxx)
