May 1940. With the success of Von Mannstein’s Sickle-Cut plan, the Wehrmacht had broken through the densely forested and hilly region of the Ardennes, bypassing the main Allied forces placing them in danger of being cut off. This led to an all-out withdrawal from Belgium. Soon the only escape route left open to the Allies was the port of Dunkirk, from which hundreds of thousands of Allied soldiers would eventually be evacuated to safety by boat to England. This was to become known as the “Miracle of Dunkirk.” Many troops, however, did not make it there. This scenario depicts a group of BEF soldiers desperately pushing for Dunkirk with German vanguard units hot on their trail. Will they make it there in time? The answer lies in your hands.
| British | German | |
| Division 1 |
3 Squad Bases |
2 Squad Bases 1x |
| Division 2 |
3 Squad Bases |
2 Squad Bases 1x |
| Strategy Decks | Command 1 Morale 1 (remove take down the Beast) |
Artillery 1 German Air Support 1 ("Tactical Bombing" where the text on the card refers to "removing a neutral command objective marker", replace it by British command objective marker) German Reinforcements 1 |
| Starting Strategy Cards | 1 (Take Cover in play area, so it can be used on round 1) | 2 (See Special Rules) |
| Operations Cards | 012 Massive Confusion 014 No surrender |
- |
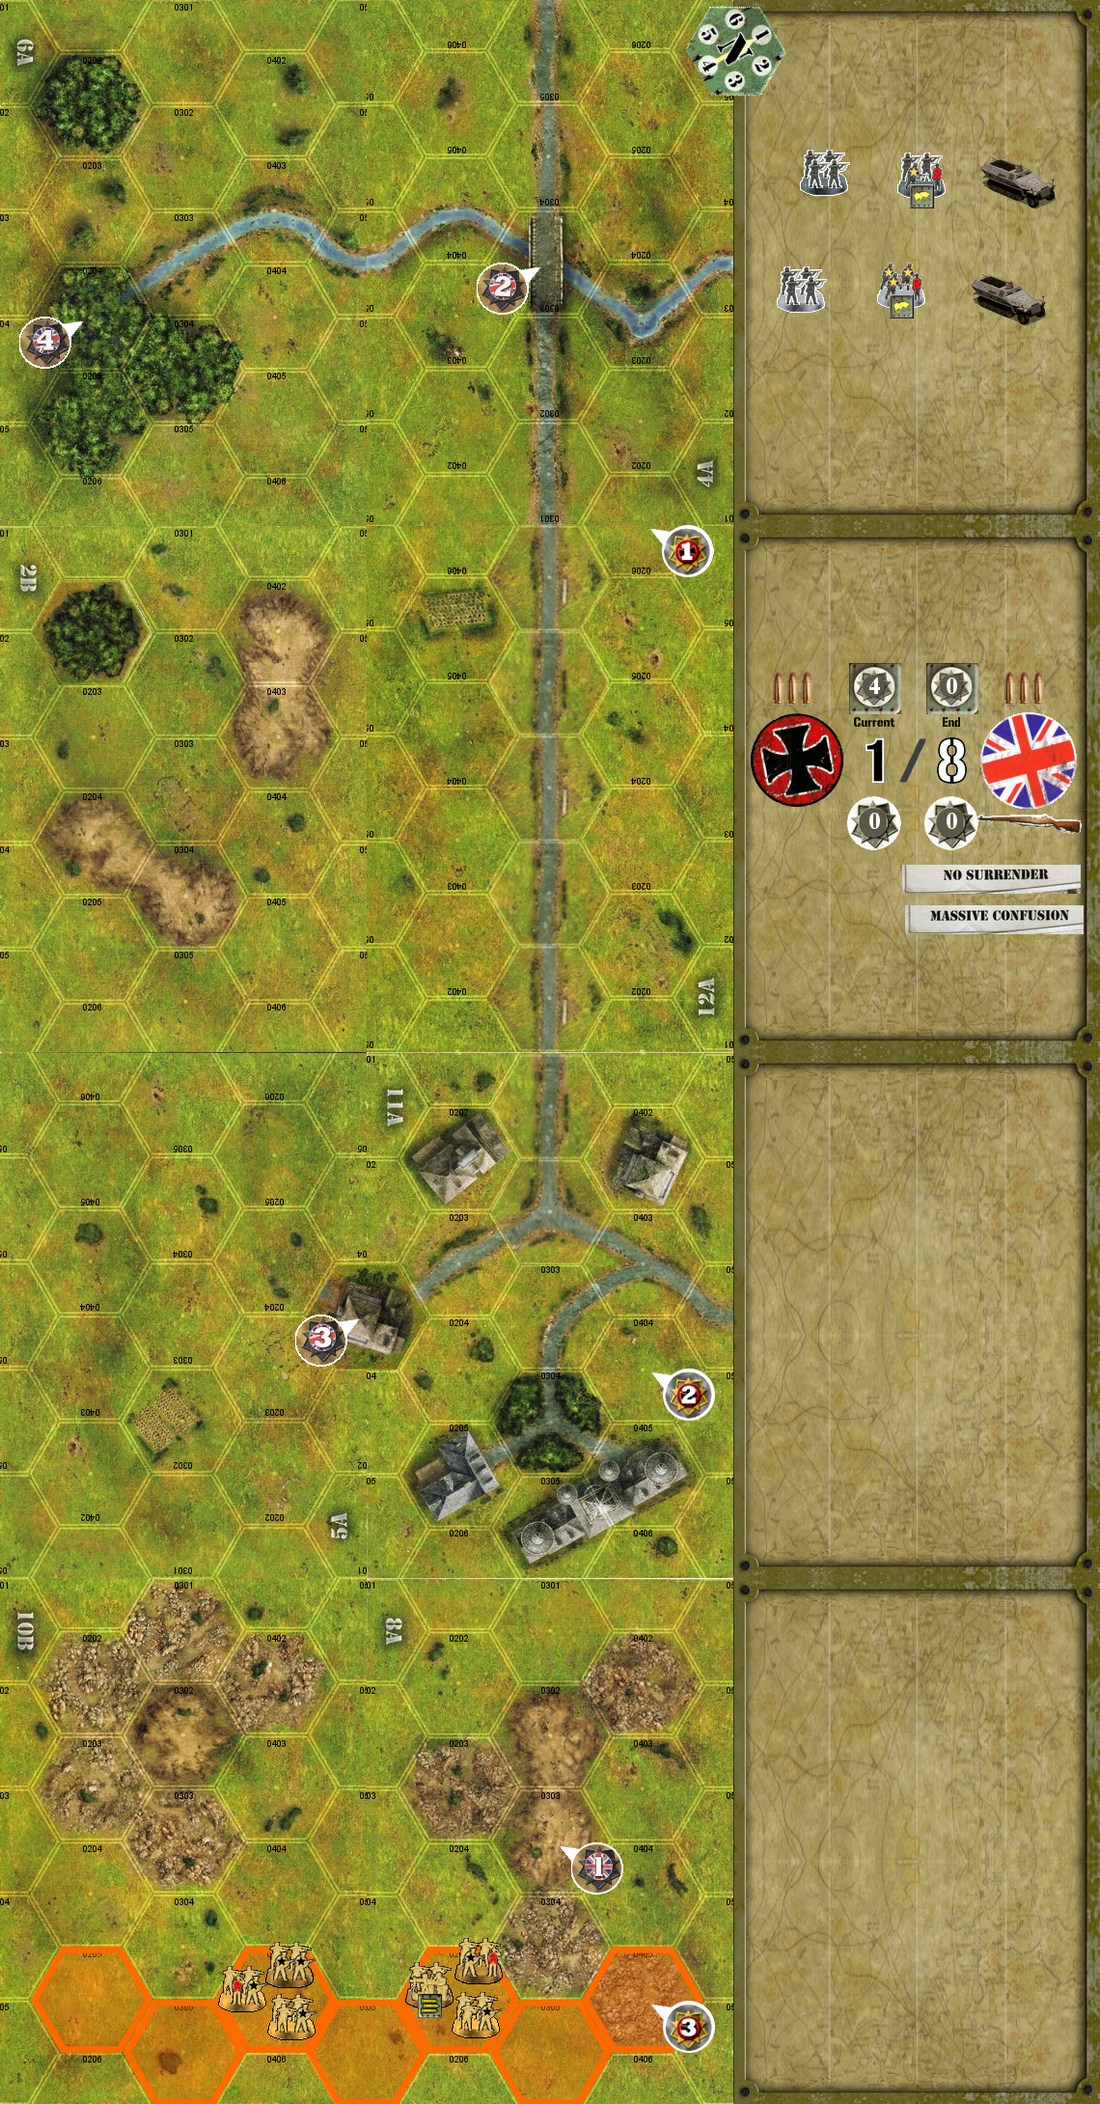
| Deployment Zone | Any hex with an orange border on maps 10B and 8A. (Designer’s note: There is no longer any real unit cohesion. Therefore Divisions 1 and 2 share the same deployment zone.) | - |
| Starting Initiative |  |
|
| Objective | The British need to exit at least three squads off the far end of maps 6A and/or 4A by the end of round 8. | The Germans win if British fails to fulfill his objective. |
| Rounds | 8 | |
| Actions per turn | 3 | 3 |
| Reinforcements | - | - |
| Special Rules |
|
|
| Terrain Features | The stream is Deep. | |
| Optional Rule | As long as no German division has entered play, the German player receives 1 command point during the command phase of that round | |
 Recon
Recon