Written by: Mark McG
Category: Campaigns of the Hōjō clan
Hits: 882
Victory Results:
 20 %
Record a victory for BOTTOM ARMY  80 %
Total plays 5 - Last reported by Davesnothere on 2022-08-05 15:19:46

HISTORY DETAILS
After a hard days fighting, the Hojo army during the night repositioned to attack Satomi Yoshihiro's army who had fallen back. Yoshihiro had expected help to arrive from his allies, but none had come during the night. The battle resumed on the second day and soon the Hojo army was able to push the Satomi army back again. Yoshihiro realized it was futile to try to defend Konodai any longer and ordered a withdrawal.
The stage is set, the battle lines are drawn, and you are in command. Can you change history?
Note: The alternative narrative for this battle continues with the Satomi army drinking heavily in celebration during the night, only to be routed with great loss by an early morning surprise Hojo attack coming from all  directions. Who would want to play the Satomi side in such a scenario?

 Players may wish to play Scenario 18 and 19 as a mini-campaign. In this case, record the number of Victory Banners gained by each army on January 7th. Before dealing cards, each player will determine block losses that are carried over to the January 8th battle. The side that won will go first. Roll the battle dice equal to the number of Victory banners won. Remove one block in an enemy unit of your choice for each circle, triangle, square and sword rolled. In the case of a sword, the block may be removed from a unit that has an attached leader. No more than one block may be removed from a unit. For each flag rolled, move one enemy unit back one hex towards it's baseline. One Honor and Fortune token is lost from opponent's pool for each Honor and Fortune rolled. The side that lost will then roll the battle dice equal to the number of Victory Banners it won.
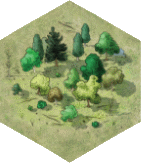
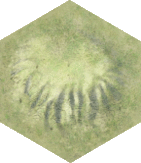
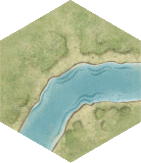
Forest Hill River River
10 9 10 4


Satomi Samurai Army (Red)
Move First
Command Card Command Card Command Card Command Card Command Card
Dragon Card Dragon Card
Honour & Fortune Honour & Fortune Honour & Fortune Honour & Fortune

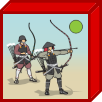
Ashigaru Yari Ashigaru Bowmen Samurai Bowmen Samurai Spearmen Samurai Spearmen Cavalry Samurai Bowmen Cavalry Infantry Leader Cavalry Leader
4 2 1 1 1 1 2 1

Hojo Samurai Army (Blue)
Command Cards 6
Dragon Cards 2
Honour 6
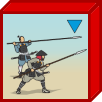
Ashigaru Yari Ashigaru Bowmen Ashigaru Arquebus Samurai Bowmen Samurai Spearmen Samurai Spearmen Cavalry Samurai Bowmen Cavalry Infantry Leader Cavalry Leader
7 2 1 2 2 2 1 2 2

Victory
5 Banners
* 1 Victory Banner for each unit or leader eliminated.
* The Hojo player will gain 1 Victory Banner at the start of each Hojo player's turn, when there are no Satomi units in a section of the battlefield. Hexes with a dotted line in this case are considered center section hexes.

Special Rules
* The entire Ichikawa River is fordable.


Log in to comment

NightOwl3 replied the topic:
1 year 11 months ago
G19 SECOND KONODAI (January 8, 1564) -


Judd and I jumped back into Samurai after our Easter break and MOI. We rated sides from last time, G18 not knowing about the mini champaign option. Maybe next time we will try that.

I started out with two cards I wanted to use at the right time: Personal Challenge and Cav Charge. I also had some nice left and right cards that let me move up to my hand which was six. I quickly pushed left, then center, and then right. The right was actually I hold and shoot. I got some good hits early, and knocked out two units that way. I could not get both my cav units in position and held off. With a Cav charge I would be able to hit two of Judd’s generals who were alone. However, Judd moved center with his two Cav units and block my plans. He had some good attacks using his horse leader. I was not able to take out his second Cav unit though. He got to VPs on me and was about to cross the river and flank me. Thankfully, I was way up in Honor and worked my leader next to his. He attacked me and I played the Personal challenge. The dice would be 9-5 in my favor. I joked that usually the person who plays this card dies. However, this time I had many more swords. I think it might have been 5-0 or 5-1. With his leader dead, Judd could not get the extra die on the attack. He did not take out my unit or leader, and I got this last block on the Cav to win the game. I had the advantage all the way, but it was still a great game.

Next time Judd let’s try the mini champaign with G18 and G19
Mark-McG replied the topic:
2 years 2 months ago
Following on from scenario 18, the campaign rule tends to punish Red more, which simply adds to the already difficult situation for them.
Blue won 5-2