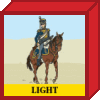
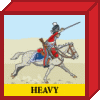
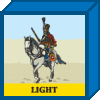
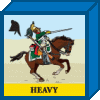
012 Garcia Hernandez (23 July 1812)


Garcia Hernandez - 23 July 1812
Historical Background
Bock’s heavy (Kings German Legion) cavalry brigade and Anson’s British light cavalry brigade were in hot pursuit of the French army on the 23rd, the day after Wellington’s smashing victory at Salamanca. Marshal Marmont detailed Foy’s French division along with Curto’s French cavalry brigade to act as the rearguard and cover the French retreat. As the Anglo-German cavalry force approached, Curto’s cavalry retreated instead of advancing to engage, leaving Foy’s infantry alone to face the cavalry. Foy quickly ordered his rear-most units to form square, but the first square charged held their fire too long. Their volley hit home, but the momentum of the charge propelled mortally wounded horses and riders into the square. The shaken infantry did not close ranks and surviving troopers burst into the square through the gaps. The square dissolved in panic - a rare event in the Napoleonic Wars. Normally a steady square could withstand the best cavalry, but the extraordinary event of horse and rider smashing into the square led to the square’s demise this time. The heavy cavalry, joined by Anson’s light cavalry, continued their pursuit and attacked a second square. The second square was so demoralized by the destruction of the first square that its troops also broke and ran before the cavalry. Foy, seeing that the field could not be held, retired with the rest of his troops. His division had fought magnificently the day before at Salamanca, allowing the French army to escape, but Garcia Hernandez was one rear guard action too many for these fatigued troops.
The stage is set. The battle lines are drawn and you are in command. Can you change history?
|
Set-Up Order
|
Battle Notes
British Army
• Commander: Bock
• 6 Command Cards
• Optional 4 Tactician Cards
![]() |
![]() |
![]() |
6 | 4 | 3 |
French Army
• Commander: Foy
• 6 Command Cards (The two French Light Infantry units start the battle in square. The French player selects two cards randomly from his hand and places them on the Infantry In Square Track. French Command is reduced to four.)
• Optional 4 Tactician Cards
• Move First
![]() |
![]() |
![]() |
![]() |
![]() |
![]() |
6 | 2 | 2 | 2 | 1 | 2 |
Victory
6 Banners
Special Rules
The first French infantry unit eliminated will count as one Victory Banner for the British player and each infantry unit eliminated after the first will count as two Eagles.
Tags: Base Game, Banners: 6, Army: British, Army: French, Special Rule: Cavalry Battles
The battle started with General Foy leading two French Line infantry units forward in the centre to support the Light infantry in square and shoot at the British cavalry. The British Heavies under General Bock duly took some casualties.
Bock led his unit to attack one of the French Line. The infantry stood their ground, but were battered by the Heavy cavalry who took no damage.
On the French left, General Curto led one of his Heavy cavalry units forward, while Foy's wounded infantry battled with the British Heavy unit in the centre. This did not end well, the cavalry sabres finishing off the infantry. General Foy beat a hasty retreat to the security of another French Line unit. [Yes, Evert got lucky with the battle back, eliminating a French line to open the scoring 0:1.]
Another unit of the British Heavy cavalry and one of the Lights moved forward in the centre to engage the second French Line that had advanced with Foy. The infantry formed square, but took a hit, inflicting one on the Heavies in return.
Curto saw his chance and brought his full-strength Heavy cavalry forward to attack Bock's injured unit. However, the British cavalry were ready and gave better than they got. [Evert used a "First Strike" to get his retaliation in first.]
More Light cavalry swept into the centre from the British right wing while both sides' Heavy cavalry continued to exchange blows. The French Light cavalry on their left wing moved forward, seeking an opportunity. The British Lights struck first, however, eliminating what was left of Curto's Heavy unit. The General himself trotted back to take up position alongside the French infantry on the right. [That's 0:2.]
Two French Line began to advance on the right. [Finally, a right section card!] However, the British Light cavalry attacked again in the centre, putting the half-strength Line unit with General Foy into square. The infantry's bayonets did some damage, but the cavalry sabres did more, finishing off the unit. Foy escaped, only to be ridden down by the Lights. [With two banners for Evert's second infantry kill, the score is 0:5.]
Finally the French cavalry got into the action, the Lights and remaining Heavy unit charging the British Light cavalry in the centre. Two British units were eliminated, the third one damaged and the French horsemen were poised to go after the other under-strength British cavalry. [A "Cavalry Charge" card brought some hope as the score went to 2:5.]
However, that battered British Light cavalry seized the opportunity to bypass its opposite numbers and hack down General Curto. With no leaders left, the demoralised French conceded the field. [2:6 is the final score.]
Dashed unsporting, though, riding down lone Leaders - not once, but twice! My own fault for not taking Foy off the battlefield, but I hoped to link him up with the French cavalry. You'll notice that virtually all the action was in the centre. The lack of left or right section cards meant I couldn't carry out my initial plans. And the aggregate score is definitely with Evert: 8:11.
It's an interesting scenario, both sides being handicapped in different ways. The British by having no infantry (Evert used a "Bayonet Charge" to move one unit at one point) and the French by having fewer cards while their units are in square. The British can wear down the French squares, while the French need to get their own cavalry into the action.
The first move from the British was to try to neutralise the two French Line infantry that were backing up the Light infantry squares. Generals Anson and Bock got in on the action, leading units from the British left and centre. Faced with Anson's Light cavalry, one Line unit formed square, taking casualties and inflicting some as well. The other tried to stand up to Bock's Heavies, but thought better of it, scampering back to join their comrades and General Foy. [ I used a "Leadership" card.]
French General Foy promptly led three Line units forward, their musketry inflicting casualties on Bock's Heavy cavalry unit, which pulled back out of range.
With the British cavalry making little impression on the French squares, Foy sent two Line units forward again. This time the muskets were deadly, eliminating Bock's Heavy cavalry. Bock himself trotted back to join a different unit. [Lucky dice from Evert, making the score 0:1.]
As the two French Line units advanced further, the British cavalry swapped casualties with a French square. Then General Gleichen on the left flank swung his heavy cavalry around the squares to attack the reinforcements. Deciding to stand firm, the French were slaughtered. [My turn for some lucky dice and the score's 1:1.]
More French Line units moved up, but Gleichen's men retired and reformed. French Heavy cavalry moved forward in the centre. occupying the woods. Three British Light cavalry advanced in the centre in turn, allowing General Anson to move back with his battered unit. The French Line attacked! [Evert had a "Bayonet Charge".] One hit Gleichen's Heavies, causing casualties even as the cavalry retired. The other did the same to a Light cavalry unit.
The British cavalry countered in the middle, demolishing one Line infantry and forcing General Foy to run for the trees - where he joined a Heavy cavalry unit. [As the second French infantry eliminated, that was two banners for me, making it 3:1.]
The French cavalry moved forward on their centre-left. And the British Light cavalry charged, sensing an opportunity to pick off one of their counterparts. Bad mistake. The French Heavies got in on the action, destroying two Lights, despite taking some casualties. [ I had a "Cavalry Charge" I'd been itching to play since the start, but Evert's battle backs did more damage. That's 3:3.]
The British Heavy cavalry on the British left continued to make no impression on the French squares while the French Heavy cavalry on their left finished off another Light cavalry. [3:4]
Finally, the French Line in square crumbled under the continued cavalry attack while another British Light cavalry fell to the French Heavies. [5:5]
General Foy took his (damaged) Heavy cavalry to take on Anson's (more damaged) Lights in the centre. The British Lights stood their ground, Foy's men coming off worse. More Light cavalry came to his aid, while Bock and his Heavies circled round to make another attack on one of the original squares. What was left of the French Light infantry fell to the horsemen. [6:5]
Phew, that was close! However, I think it shows that cavalry can grind down infantry in square. Evert was hampered by how few cards he had in his hand, but the French cavalry still beats the British cavalry in a straight fight.
The second playing had the French all aggressive at the start and they took the first honors after rifle and artillery fire eliminated a Brit HC. After finding the French squares hard to whittle away the British cav went for easier targets and soon had 4 French LI in square and Foy plus the artillery out of the battle (2-2). Further aggression by the French HC had the British LC reeling and despite taking out a French LI it was soon the British on the back foot looking desperately for quick kills to try to get back into the game (5-3). despite getting a second French LI (5-5) the British lost it when the French HC charged home and routed a 4th Brit LC with 3 swords in 1 roll to win a tighter and more exciting 2nd playing.